Tutorials - How to make a general page
In this tutorial, we are going to make a page and add content.
Dashboard
Firstly, please access your admin panel and log in with your admin username and password. You will be redirected to the dashboard.
There are many menu items available in the top navigation menu. Go to the 'CONTENT' menu and choose 'PAGES'. Or choose the 'PAGES' icon on the dashboard.

PAGES area
Here you will see a list of the site pages. You will also see 'MENU ITEMS'. 'MENU ITEMS are not pages as such but the 'parent' name (menu headings) of the navigation menu on your website - the drop-down menu containing multiple pages called 'CHILD PAGES'. To find out more about adding pages to navigation menus, click here.

To add a PAGE
Here you will see a list of the site pages.
- Add a page by typing in the page name in lowercase with no special characters.
- This will become the URL of the page eg yourdomain.com.au/about-us. Please note: the page name will be automatically converted to an URL safe name eg you add 'about us' and the system will convert the space to 'about-us'. The menu item on the front-end of the website will not contain the dash. You can also make the page name for the menu completely different later if you wish eg 'about our company' without affecting the URL name. This is handy for SEO purposes.
- Click the SAVE icon
 .
. - Your page will be saved in the list.

PAGE OPTIONS
Once you have made a page, they will be a number of options available to you.
Click the green arrow button ![]() to open the options panel, please see descriptions below.
to open the options panel, please see descriptions below.
To add or edit EXISTING CONTENT, click on the EDIT icon ![]() .
.
To add or edit SEO meta tags and google tags, click on the EDIT icon ![]() .
.

TO ADD CONTENT or EDIT CONTENT
To EDIT existing content
To edit an item click the EDIT button.

To ADD content
To add an item, click the ADD NEW button, a new window will load, where you can give the item a name or description.


The page will refresh and show you a series of tabs to add content.
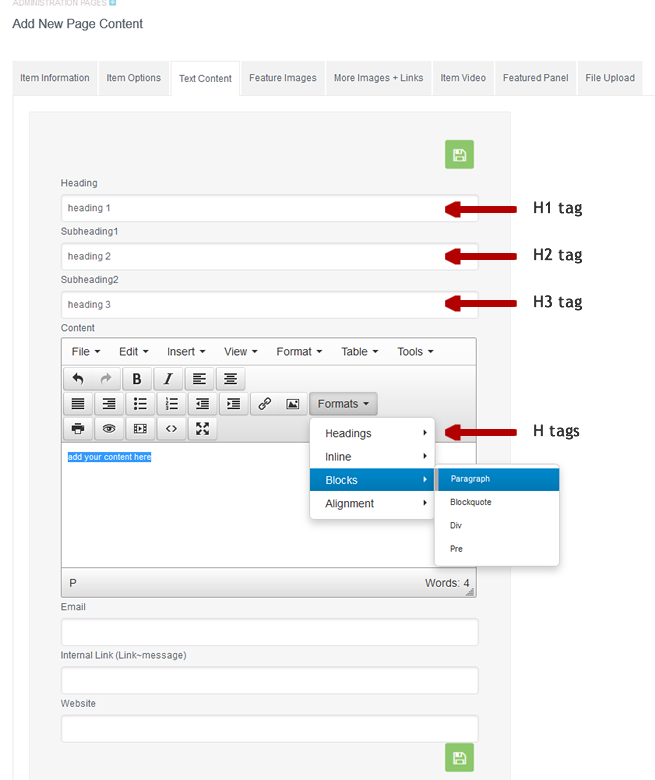
Click the TEXT tab to add or edit your text content.
We have 3 heading fields which automatically contain the 'H tag' styling. These heading will range in size and format according to the template design. You can use these headings to suit your page or item content. * always click the Options SAVE icon when making a change to each option
Click the MORE IMAGES tab to add or edit images.
* always click the Options SAVE icon when making a change to each option

You have many options to use if you wish. * always click the Options SAVE icon when making a change to each option

Add Feature Images
Feature Images are similar to standard images but there are only 2 feature images and they can be set to sit in a different position an/ or on a listings page. * always click the Options SAVE icon when making a change to each option
